Hello there! how have you been? I have been as busy as a bee with the daily routines..being Mom,wife, daughter, teacher, baker, cook, home-maker (maid), ah!.....and not to mention, driver! Well that's me and I am proud to know that I am living my life to the fullest. I simply LOVE my life, just the way it is! How about you?
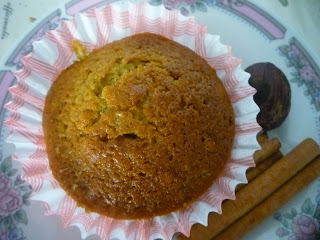
As you know last week's post was just pictures and no details of the Delicious Pumpkin Muffin. I must say that it was a delightful snack which all members of my family enjoyed. Surprisingly my little son also took a liking to it.
Well, actually I was a little sceptical about how he would precieve it. I thought that he might just eat it to please me however I was so pleased to hear that he truly enjoyed it as he packed some of them for his school break two days in a row!
What makes me so excited is that I am able to pass on this humble yet very nutritious fruit or vegetable to my family in another form... We sometimes have it as a side dish for our meals. So now I have convincingly succeeded introducing the pumpkin muffin. An awesome achievement by my standards!
Just to share with you some of the nutritious facts of the pumpkin; The bright orange colour of pumpkin is a dead give away that pumpkin is loaded with an important antioxidant, beta-carotene. Beta-carotene is one of the plant carotenoids converted to vitamin A in the body. In the conversion to vitamin A, beta carotene performs many important functions in overall health.
Current research indicates that a diet rich in foods containing beta-carotene may reduce the risk of developing certain types of cancer and offers protect against heart disease. Beta-carotene offers protection against other diseases as well as some degenerative aspects of ageing.
Anyway without much delay, here is the 'HOW TO MAKE' these delicious VALUE packed delectables...RECIPE FOR DELICIOUS PUMPKIN MUFFINS
Makes 1 dozen
Active time: 15 min.
Start to finish: 1 hour
INGREDIENTS:
1.5 cups all-purpose flour
1 tsp baking powder
1 cup pumpkin puree
1/3 cup vegetable oil (conola is my favourite)
2 large eggs
1 tsp pumpkin-pie spice (a combo of cinnamon, nutmeg, cloves, ginger, and allspice)
1.25 cups plus 1 tbsp sugar
1/2 tsp baking soda
1/2 tsp salt
1 tsp cinnamon
1/2 cup sunflower seeds (optional)
1/2 cup raisins (optional)
Equipment: 12 foil or paper muffin liners; a muffin pan with 12 muffin cups.
DIRECTIONS:
Put oven rack in middle positions and preheat oven to 350F. Put liners in muffin cups.
Whisk together flour and baking powder in a small bowl.
Whisk together pumpkin, oil, eggs, pumpkin-pie spice, 1.25 cups sugar, baking soda, and salt in a large bowl until smooth, then whisk in flour mixture until just combined.
Stir together cinnamon and remaining 1 tablespoon sugar in another bowl.
Divide batter among muffin cups (each should be about 3/4 full), then sprinkle tops with cinnamon-sugar mixture. Bake until puffed and golden brown and a wooden pick or skewer inserted into centre of a muffin comes out clean, 25 to 30 minutes.
Cool in pan on a wire rack for 5 minutes, then transfer muffins from pan to rack and cool to warm or room temperature.
Tips:
*When using fresh pumpkin, cut and clean the skin off the pumpkin and then cut into relativity big chunks. Then put in a pot of water covering just the top of the pumpkin. Then boil till tender. Keep a watchful eye on it so as to not over boil it. This will prevent the nutrients from being lost. Drain off the water. Reserve a just enough for blending.
When cooled put into blender and blend it until smooth with a little water saved earlier so as to get a thick consistency of the pumpkin purée.
Till next time....Enjoy baking!
Cheers!
Sherry


